The air conditioning unit plays a huge part in the overall comfort that makes your home a haven for rest and relaxation. At some point after continuous use, you will notice that the cooling capacity of your Air conditioner has subdued and is now working harder, trying to achieve the level of cooling it once did. The same applies to its heating capacity, which becomes less and less over a period. This is where cleaning the air conditioner is essential to give the unit its former glory of being energy efficient and being able to perform at its best. Get all of these benefits while also extending the lifespan of your air conditioner.
Properly cleaning your air conditioner is very critical to its overall maintenance, which keeps the unit healthy and makes it last longer. What this means is that by keeping this up-to-date, you have already saved a lot just by being able to avoid costly repairs and fault checkups. Enjoy all these savings on top of what you have already saved with the lower electricity bill you are paying. By giving it time, patience, and precision, you can clean your air conditioner and save more by doing this on your own. Here we will show you how to clean a split system air conditioner in few simple and doable steps.
How to Clean your Air conditioner Indoor Unit
Here are the steps you need to take on How to clean your Air conditioner Indoor Unit:
Switch off the power supply of your Air conditioner
Air conditioning units consist of many moving parts, and since safety is the priority, make sure to switch off its supply of electricity from the breaker switch box and not just the pressing off on the remote control.
Open door panel of the Indoor Unit
Your air conditioner indoor unit should have a trap door that you can open and detach, which usually is almost the whole side of its housing. You will then need to unscrew on some units to be able to fully detach the trap door.
Clean Air conditioner Evaporator coils
By using a soft brush, you can start by removing the dust and dirt build-up on the coils. Then, once loose particulates have been removed, you can either use a no-rinse coil cleaning solution that you can buy from your local home improvement. Leave it and allow the chemical to work its magic and cleaning these critical parts safely and efficiently.
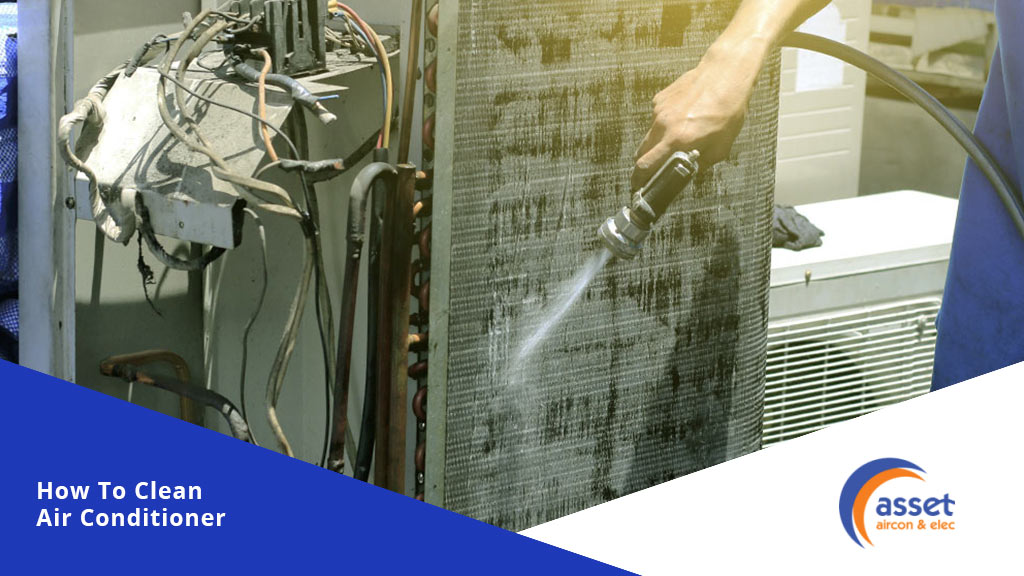
Otherwise, with the proper materials and equipment, you can also use a pressurized washer to spray the coils clean and allowing them to drain, just make sure to avoid spraying directly on the electronic box, which is usually positioned on one side of the unit.
Clean the Drain Pan
Once you are done with the coil cleaner and the pressure washing of the dirtiest parts of your indoor unit, it is time to get the drain pan cleaned. You can begin by using plain soap and water to wash it clean and a rinse of bleach mixed with water to sanitize. A half-and-half mix is just about right for this purpose. Pour the solution into the drain to make sure it is clear of any buildup, but if you want to make sure of this for a longer time, then there are Air conditioning drain pan tablets, which you can get from a hardware or home improvement, and its super simple to use.
Otherwise, if the drain line is clogged and not allowing the drain water to flow through, then you will have to address and clear the drain first using sub-step 4a, before even thinking of proceeding to the next step.
Unclog the drain pipes of your Air conditioner
If your bleach solution can flow down easily and comes out clean, then this confirms that it is clear and you can proceed to the next step. But if the flow of the solution out the drain is slow and seems obstructed, then you have a plugged drain. Due to untimely and irregular cleaning, mould and algae growth can happen and can choke your drain pipe easily, which is only about an inch in diameter.
Locate your drain outlet somewhere outside your home. Follow the drain line and bring a wet/dry vacuum with you to where it ends. Take the vacuum nozzle and attach it to the drain outlet and use a towel to fill in the gaps between to provide a tight seal. For better results, you can use duct tape to get them to stay together. Once attached and sealed, run your vacuum cleaner at full speed for the next three minutes and check after to see if the clog is removed.
Close the Access Panel of your Indoor unit.
Like how we started, you can now reattach the access panel through the same holes and screws you have removed them from. If you have an HVAC foil tape, use this to seal the access panel from the top and bottom parts, but make sure not to cover any of the labels inside, as these contain information that is useful to technicians.
You’re done cleaning your indoor unit! This is all that you need to do when doing regular cleaning but be prepared as there might be some challenges to encounter that you will not be able to handle on your own. One of which is if your unit has an A-frame evaporator that is designed to be closed on both ends. If you have not done this before, we recommend leaving this in the hands of capable professionals to make sure you don’t do damage or worse, destroy your air conditioner.
How to Clean your Air conditioner Outdoor Unit
This part of cleaning your Air conditioner Outdoor unit and its condenser coils will require more work compared to what we have just done with our indoor unit. What causes this is its constant exposure to the outdoor elements, making the outdoor unit turn dirty so quickly. It also needs using some specialized equipment to get it cleaned properly.
So let’s go on and take it step-by-step to make your outdoor unit perform its best again.
Cut Power supply and Remove the Grills of the Outdoor Unit
Before anything else, make sure all electricity going to the unit is cut off totally. Safety is the priority. Locate the switch box and switch it off as your very first step in getting started.
Locate and unscrew the sheet metal that is part of the housing, of the air conditioner unit. Then remove this by lifting the fan unit and the grill, and this should be removed but will still be caught into some wiring, so make sure not to pull too hard. Don’t worry as these should normally have the same extra length as slack for the electrical connections. Set it down against the wall, upside down, so you don’t have to remove any wiring.
Get rid of any Debris in Air Conditioner
Start picking out the big, easy ones, like leaves, twigs, or even sometimes dead insects caught below the bottom panel of the outdoor unit. This is usually the case with many models, but depending on what unit you have, some will have guards installed to lessen this from happening or yet to totally avoid it.
You can just scoop those debris out or use a wet/dry vacuum so you can clean it effectively and include getting the loose dirt as well, allowing you to sneak in those tight corners.
Clean the Fans and the Fins
This may look daunting in the beginning, but once you get the whole idea, this is quite simple. But be careful, as we will be using a coil cleaning solution, which you can get in any home improvement store. Keep in mind that this cleaner is casting and can burn your skin if handled incorrectly. Plus, its fumes are dangerous to inhale, so use proper protection and only do this In an open and well-ventilated area where our outdoor unit is normally located.
Dilute the cleaning solution by mixing with water, following the instructions on the label. Pour into a pump spray, prime it up, then spray generously and evenly across the coils and this will foam gradually and up in a few minutes. Once this is starting to melt away with the grime and dirt, you can go ahead and hose this off with water.
A pressure washer should not be used during this part, as the fans are a bit delicate and could get damaged easily.
Straighten the Air Conditioner Fins
Fins that get bent also affect and reduce the airflow of your system, so this is a vital step in giving back its efficiency and effective cooling capacity just like its former glory. The best way to do this is to get a fin tool. This is a cheap kit that is designed with teeth to allow a combing action covering a lot of fins per inch. Check and make sure to pick the right fin count per inch to make sure they go back in place as intended.
Clean the surroundings of your Outdoor unit.
Replace the panels and the fan cage and reattach them with the screws that you have removed earlier in the process. Clean as you go and make sure to check all nooks and crannies for any missed debris or dirt. Also, check the surrounding area at least two feet around on all sides and clear them with any potential materials that could eventually get sucked and stick in the unit.
Check and Level the Outdoor Unit
Dirt may pile up and settle below the outdoor unit causing it to tilt in very small increments that is not obvious to plain sight. If this is the case and if the condenser will stay far too long this way, it will cause issues that will make it fail early and lead to costly repairs. So it pays to check and adjust if your condenser unit is not level by using shims to balance it out.
If you are keen on getting your hands dirty and start cleaning up your own equipment, we are happy that we are able to help and guide you in this process, But, if not, then we still have a solution for you!
At Air Conditioning Gold Coast | Asset Aircon & Elec, we can do all this, with our team of experts, who will come to your home and do all this for you! A reliable and trusted Air conditioning service provider in the Gold Coast.